Wednesday 27 August 2014

watercolor card

Good afternoon !!!

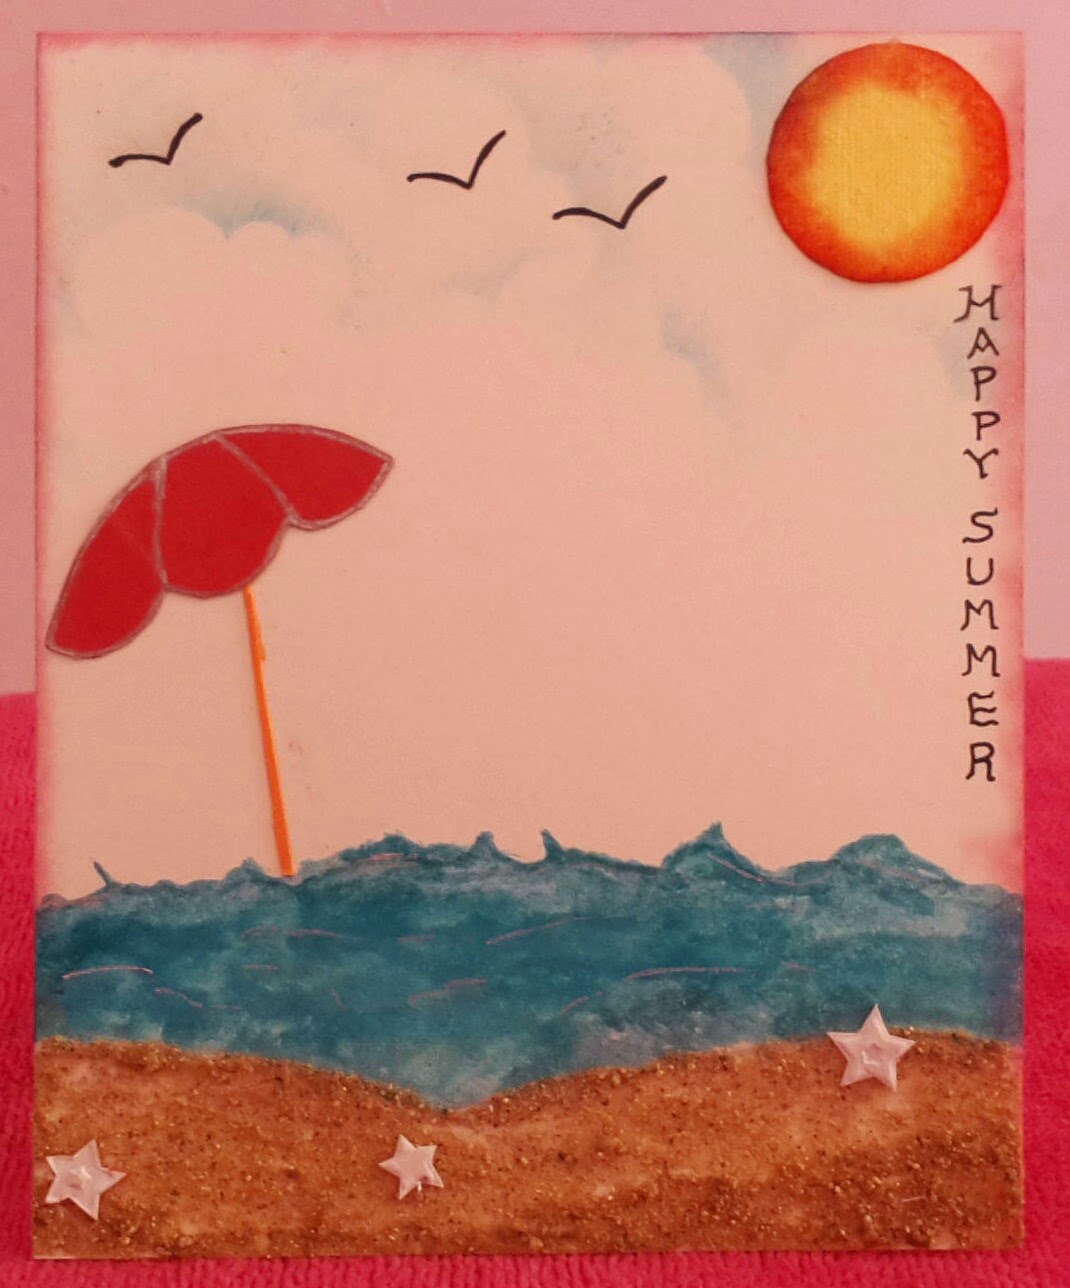
A very quick post on water color effect I tried for a challenge. After so many failure attempts I made this.


Incorporated masking technique and distressed with distress inks. Then sprayed some water with mini mister and used small brush to get the above effect .


Linking this to http://beyondgrey.blogspot.in/2014/08/bgc57-watercolors.html

Friday 8 August 2014

Have a rainy day!!!!

Hope everyone is having good time enjoying this pleasant climate.!! These rainy days reminds me of my childhood days where I used to play in rain...But now
whenever it rains I used to watch it from the window thinking of those good old days.
Having that in mind I created this card


The actual stamp was like a girl holding a star . Using masking technique I stamped this girl without that star and added  this hand drawn umbrella . 
By spraying water I created the water effect at the bottom . 


Linking this toimaginations anything-goes-with-monsoons challenge


Thursday 7 August 2014

Paper Quilting !!

Tried this quilting technique with patterned papers today and am satisfied with the results. Used some of my scraps to create this card.


I did not like to decorate this card much so kept it very simple . Hope you like it:)


Wednesday 6 August 2014

Masculine Card

Hi!!!
        A quick post on masculine card! A very simple and CAS type card that I made today.


Created landscape with distress inks. Thought of getting a scattered clouds effect with blue distress ink, but i didnot succeed :( Hand drawn the golf stick and colored it. Placed a half pearl for golf ball. And stamped the sentiment .

Linking this to

http://lulupu.blulupu-challenge-36-make-it-macho
kraftzone challenge 8 cas


Thursday 10 July 2014

Braided ribbon tag

Hi all,
       
Happened to see  ribbon braided headband tutorial in YouTube. It was an excellent technique and wanted to try it immediately. The outcome was gorgeous and that's when I thought to implement that somewhere in lulupu bingo challenge. Here is the result.......

Took ribbons, patterned papers,chipboard grid to create this simple tag.


Those flowers and leaves were handmade without any punches or dies. A very simple tag. Hope you like it 

Linking this to lulupu-challenge-34-bingo (used ribbons , patterned paper and chipboard)


Thursday 3 July 2014

Simple pop up card

Good evening !!

               Had fun making this pop up card. Even though it is very easy to make I found it difficult to decorate the card. I did not decorate much ,as the pop up mechanism is the center of attraction.


Those flowers were made without any punches . stamped butterflies and fussy cut to decorate. Placed my favorite stamp and die cut in the center and finished this card . 

Used patterned paper, dies, ribbons,leaf punch, pearls and butterfly


Tuesday 1 July 2014

Heat embossing - My new interest

Good morning!!
 
              When i saw lulupu's bingo grid challenge ,without much confusions I chose the grid with heat embossing , ribbons and sprays because,  just recently I got to know about heat embossing and I have started exploring  this.

             I was so ignorant that i didnot even know i need a heat gun to emboss. I thought the hair dryer will do it :(

            I am yet to buy a heat gun to emboss. With the help of my dosa tawa I embossed the flower :p.
       
            I know i must try another wonderful card with different grid definitely.


Distressed with yellow and red. Those flowers were heat embossed and sprayed with water ...

With the same technique  tried different color combination 


I know the silver spray I made at home did not work well.  
Any suggestions for improving embossing and spray technique is really appreciated .

Linking this to lulupu-challenge-34 bingo grid. (  heat embossing , ribbon and spray)

Monday 30 June 2014

Celebrate heartily

Hi all

         I am getting comfortable to make CAS cards after seeing so many from several other great blogs.  Discovering a new way of using it daily and I absolutely love my distress inks.

      I made this card for CASual Fridays blog challenge .


Handmade the heart banner without any dies . Using the masking technique colored with distress inks. I was amazed by the result once the masking tape was removed.   


The heart banner is not too perfect still I adore this :p 
This is the heart banner I made for this card. Hope you like it . 


Saturday 28 June 2014

Welcome card

Second post in a day!!!! These blog challenges really inspire me to do this.  Made this card for Lulupu's challenge with banner. As I said earlier , I again tried a card with distressed background. It is not easy for me to get the perfect look... I need more and more practice.


The blue color lattice was created with normal square nestabilities since I don't have the lattice die. Though it was time consuming I like the way it look.
Happy that I found a way to use that extra small square die. Then added swirls , flowers, leaves and butterfly.The brick effect was  made with foam pad and scale. At last made this special heart banner which I liked the most. I found the card to be empty at the center so took this calendar part from other project and added to this card.


Linking this to lulupu's challenge challenge-33-inspired-by-new-lulupu-logo

Birthday card

It is really fun to use distress inks and Am playing with it almost everyday. Discovering many techniques like masking , brayering and embossing over it.
This card is one example of my try . Actually i came across a similar card in pinterest . Having that as model I made some changes and finally created this one.


The circles are not very smooth as they are hand cut. Then distressed with pink, yellow and red inks. Again placed a white card stock underneath and sponged it with distress inks and added dimension with foam tape. Last step is to stamp,color,cut and stick butterflies with foam tape.


Linking this to stamp,color,cutchallenge-17-stamp color cut

Friday 27 June 2014

Back again !!!!

Its been a long gap since I posted something in my blog. I had done quite a number of cards and took photographs but I  was so so lazy to write , edit and publish and missed several blog challenges. Am here today to participate in CASology blog challenge with cue word WOOD.
       
             I had several ideas with wood and ended up with wooden horse toy as I had seen someone selling it in the roadside recently. Most of us would have played with this toy when we were young.
         
            Hope this matches the cue word given in the challenge .


Hand drawn the horse and colored it with watercolor pencils. I need some good practice on watercolor pencils.  

Entering the challenge http://casology.blogspot.in cue word - wood. 
Used wooden horse toy image.

Wednesday 2 April 2014

Summer wishes card

As soon as I saw lulupu's summer themed card challenge my mind was filled with so many different ideas... I Have not tried CAS cards yet. So I really wanted to make something the same day. The first card I made was with watermelon and " Enjoy each slice of this summer" sentiment. But it looked simple and empty so came up with this beach theme which is my friend mythili's idea.


Beach, A perfect place to spend our vacation in summer. So thought it would match the challenge very well .

Planned to use real sand for beach sand and used peacock feather distress ink to color the beach. I know water looks clumpsy, am not really that good in using distress inks. It will take years  for me to master I think :(

Used some embossed stars as starfish. Thought Sun ,clouds and umbrella will make the perfect scene. And my card is done :) :)


Linking this to lulupu challenge-28-cas-cards 

Sunday 30 March 2014

Card for a baby girl

I made this card especially for itsy bitsy's precious baby challenge. Babies are the most wonderful thing in this world. I love babies especially baby girl. So decided to make this one for a girl baby with pink and white color which is the favorite color of girls.


Luckily I had a patterned paper with girl baby theme with me. Wanted to incorporate footstep concept ( dad's , mom's and little one's) in my card but I did not have any die cuts or punches for that. So I had drawn and cut those with the help of scissors. Again it looked so plain so heat embossed it with pink embossing powder. And the sentiment was also handwritten. And finally for decoration purpose I added some roses, pearls,ribbon and swirls.


Materials used
1. White , pink cardtock
2. Patterned paper from itsy bitsy
3. Embossing folder
4. Hydrangea die for roses from itsy bitsy
5. Sizzlits swirly die

Linking this card to
 the-itsybitsy-precious-baby-challene .

 lulupu's second birthday challenge
 
             C - cardstock
             P - patterned paper,pink,pearls
             L - layers

    imagination-crafts challenge anything goes

http://papertakeweekly.blogspot.in/2014/04/anything-goes.html

Tuesday 11 March 2014

Surprise pop up card

I love to create interactive cards with various techniques. I wanted to try a pop up card so I started searching some easy tutorials and got one HERE.

The reason why I like to make interactive card is,you don't need any special dies, decorative punches or embellishments. With card stock,scissors or craft knife you can create a wonderful card and surprise your friends.


Recently I bought a medallion four die and wanted to use it somewhere in my card. You can see it in the left side of the card. And the triangles in the right side are scrap from some other project. The flowers in top left corners are handmade without any punches or dies whereas the flowers in the bottom right corner are made with Itsy bitsy hydrangea die. Used inked torn paper at the bottom. And finally my favorite Gorjuss doll stamp.

Card when closed 


And when you pull the ribbon at the top 


Side view


Linking this to challenge 27 lulupu 2nd birthday special(category - cards only)

C - card stock, color pencils
P- patterned paper,pearls ,pop card,peacock feather distress ink
T - torn paper at the bottom
L - layers of cardstock


beyondgrey challenge torn and flowerful used inked torn paper at the bottom of the card

Wednesday 5 March 2014

Clay Miniature Cake

Tried my hands on baking sorry making a cake with clay after my successful miniature clay food post . I got a huge positive response for that!!! This is a super easy cute cake to be made!!!!

 All you need is
1. Clay
2. Rolling pin
3. Oil colors of your choice

How I made

1. Prepared two balls of clay, one in white and one in pink
2. Rolled out the clay flat and thick
3. Using circle cutter, I had cut two white and two pink clay pieces
4. Then arranged it alternatively
5. Again rolled out the white clay little bit thin and covered the whole cake with it.
Then using a sharp knife cut a piece to show the different layers of cake and decorated it with little roses.


Used sharp pointed tool to create impressions on the sides of the cake. Creating option here is endless. Change the color, shape and decorations to make more attractive cakes.


Sending this to Lulupu 2nd birthday challenge  (Category 3  - everything goes)
C- clay , cake
P- pink color
L- layers of cake

Thursday 27 February 2014

Miniature clay food

My love towards miniatures started right from my childhood. Most of us would  
have played with the natural clay and created kitchenwares when we were kids. Nowadays we do get different types of clay which inspires us to try new things...

I had used air dry clay which is normally white in color and I mixed oil colors with it to make it colored. I tried making some really easy food stuff with help of YouTube videos and it came out good. So I wanted to share those tutorials here........


As you can see I made waffles,chocochip cookies,macrones,idly (famous south Indian dish) , sunny side up eggs and waffles with ice cream.

Materials needed

1. Air dry clay
2. Oil colors
3. Craft knife
4. Rolling pin
5. Match stick


Waffles 


Take a small ball of clay and tint it with brown oil color

Roll it flat with rolling pin and cut a small square out of it . With match stick make the impression


Waffle cone

Draw a grid pattern in a small piece of clay. This will be our mould  for waffle cone


Sunny side up egg


Tint very small ball of clay with yellow oil color

Spread the white clay as u wish and place the yolk. You can pour clear drying glue over it to get the shiny effect as in original egg

With our imagination we can create infinite little charms like this.